Creating & organising lights
Supported lights
Section titled “Supported lights”The panel lists every Redshift light in the active document:
| Type | Notes |
|---|---|
| RS Infinite | |
| RS Point | |
| RS Spot | The Spread column is the cone angle, in degrees |
| RS Area | Area Shape, Bi-Dir and Opacity apply |
| RS Dome | Takes an HDRI or other image |
| RS IES | Takes an IES profile |
| RS Portal | Links to an environment shader |
| RS Physical Sun | No exposure, shadow switch or texture |
Cinema 4D’s standard lights and other renderers’ lights are not listed.
Create a light
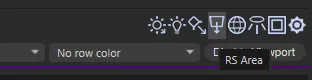
Section titled “Create a light”Click one of the light-type icons at the top right of the panel; hover over an icon to see which type it makes.
The new light is added at the top of the Object Manager, named after its type (RS Spot Light, for example) and selected. Spot, Area and Portal lights start with the default spread — 40° for a Spot, 1 for Area and Portal.
Change a light’s type
Section titled “Change a light’s type”Pick a new type in the Type column. The light is renamed to match — RS Spot Light.1 becomes RS Area Light.1 — unless you have given it a name of your own. If the row is selected, every selected light changes.
Rename
Section titled “Rename”Double-click a name, type the new one and press Enter. Renaming a selected row gives every selected light that name.
Select All / Deselect All
Section titled “Select All / Deselect All”Selects every Redshift light in the scene, or clears the selection. The selection is the Object Manager’s, so it shows there too.
Delete Selected
Section titled “Delete Selected”Deletes the selected lights after you confirm (Confirm Delete?). Undo with Ctrl+Z.
Reset to Defaults
Section titled “Reset to Defaults”Resets the selected lights to their type’s defaults — intensity, exposure, colour (white), colour mode (Color), temperature (6500 K), shadow and the other common values — and the default spread for Spot, Area and Portal lights. The defaults are listed in Editing values.
For a light driven by an RS Light Material, intensity, exposure, colour, colour mode and temperature are reset in the material’s graph.
To reset one value instead, Ctrl+click it.
Organise Lights
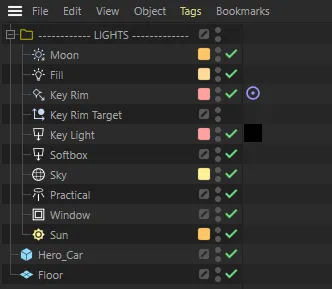
Section titled “Organise Lights”Moves every Redshift light in the scene under one null named ------------ LIGHTS -------------
(with a yellow icon), sorted by type in the same order as the header icons. If that null already
exists, it is reused.
Target nulls made with Add Target move with their lights: a light’s own target goes straight after it, and a target shared by several lights goes inside the null, after the lights.
Undo with Ctrl+Z.
Add Target
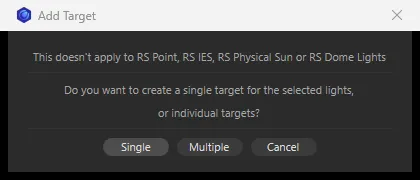
Section titled “Add Target”Makes the selected lights aim at a target null, with Cinema 4D’s Target tag.
- Select the lights.
- Click Add Target.
- Choose:
- Single — one null, RS Light Target, that every selected light aims at.
- Multiple — one null per light, named ‹light name› Target, placed next to its light.
The new nulls are selected so you can move them straight away. Point, IES, Physical Sun and Dome lights can’t be aimed this way and are skipped; the window says so when your selection includes any.
Hide lights in the viewport
Section titled “Hide lights in the viewport”Disable Viewport in the view bar hides every Redshift light in the editor viewport; the button then reads Enable Viewport to show them again. Rendering is not affected, and the change can be undone.
Global Preview
Section titled “Global Preview”The GLOBAL PREVIEW controls next to the search field affect the viewport only, for every Redshift light:
- Wireframe — turns Redshift’s viewport illumination display on or off for every light except Dome lights.
- Illumination Adjustment — scales the lights’ viewport preview brightness from 0 to 1. Render values don’t change, and it is not recorded for undo.