
Getting started
What you need
Section titled “What you need”- Cinema 4D 2024, 2025, 2026 or 2027, with Redshift installed and working.
- Windows, or a Mac with Apple silicon. Intel Macs are not supported.
Install
Section titled “Install”The easiest way to install and license RS Light Manager is the aescripts + aeplugins manager app. Sign in, find RS Light Manager in your list and install it. To try it first, add the trial from the manager.
Restart Cinema 4D after installing.
Bought it from Chroma on Gumroad instead? See Licensing & support.
Open the panel
Section titled “Open the panel”Choose Extensions ▸ RS Light Manager. If you use other Chroma plugins, it is also in the Chroma menu.
The panel opens floating. Dock it like any Cinema 4D manager and save your layout to keep it there. Running the command again while the panel is showing folds it away; running it once more unfolds it in the same place.
License it
Section titled “License it”The first time you open the panel, the aescripts licence window appears.
- Bought it? Enter your serial number.
- Trying it? Type
trialto start the 14-day trial.
Once that is done the panel opens. The full steps, and how to move a licence to another computer, are in Licensing & support.
Your first five minutes
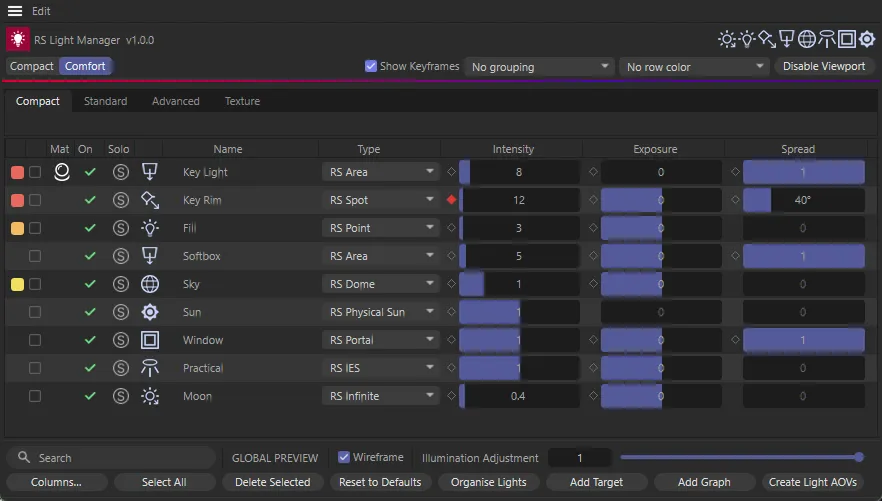
Section titled “Your first five minutes”- Open a scene with a few Redshift lights — or click a light icon at the top right of the panel to create one.
- Drag left or right on an Intensity value to change it. Right-click or double-click it to type a number.
- Select a few rows (click the names, Shift or Ctrl+click to add), then change a value on one of them: every selected light changes.
- Switch between the Compact, Standard, Advanced and Texture tabs to see more or fewer columns.
- Press Ctrl+Z (⌘Z on macOS) — every edit in the panel is one undo step.
Next: the Interface tour.