Editing values
Every change you make in the table is written straight to the scene, shows in the Attribute Manager, and is one undo step — press Ctrl+Z (⌘Z on macOS) to undo it.
Sliders
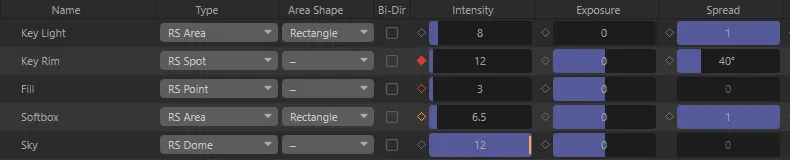
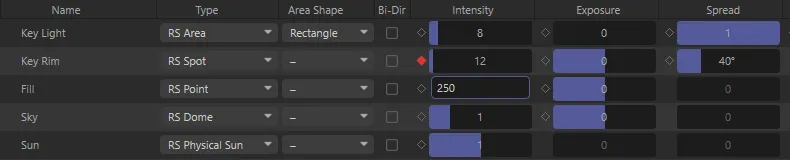
Section titled “Sliders”Every number in the table is a slider: a bar filled to the current value, with the number on top. A small orange mark at the right end means the value is above the slider’s range (you typed it).
| To… | Do this |
|---|---|
| Change a value | Drag left or right on the slider |
| Change it finely | Hold Shift while you drag |
| Jump to a value | On a wide slider, click where you want the bar to end. Narrow sliders only change when you drag |
| Type a value | Right-click or double-click the slider |
| Reset it to the default | Ctrl+click the slider |
| Open the cell menu | Right-click the key-diamond strip at the slider’s left edge |
However far you drag, the whole drag is one undo step.
Typing a value
Section titled “Typing a value”Right-click or double-click a slider and a text field opens over it, with the value selected.
- Enter applies the value.
- Esc cancels.
- Clicking elsewhere applies the value.
A comma works as the decimal separator as well as a full stop. For a Spot’s cone angle, type degrees. Intensity and Exposure take values beyond the slider’s range; the other columns stop at their range.
The cell menu
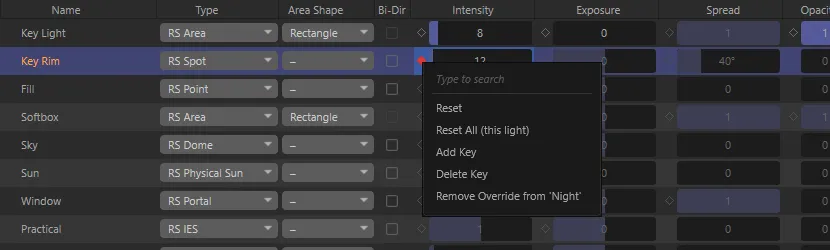
Section titled “The cell menu”Right-click the narrow strip at the left edge of a slider (where the key diamond sits), or a Color swatch, to open the cell menu:
| Item | What it does |
|---|---|
| Reset | Resets this value to its default — on every selected light, if this row is selected |
| Reset All (this light) | Resets every value the panel knows for this light only |
| Add Key / Delete Key | Sets or removes a keyframe at the current frame. See Keyframes & takes |
| Override in ‘take’ / Remove Override from ‘take’ | Shown while a take other than Main is active |
The strip opens the menu even when Show Keyframes is off; Add Key and Delete Key are left out then.
Default values
Section titled “Default values”Ctrl+click, Reset, Reset All and the Reset to Defaults button use these defaults:
| Value | Default |
|---|---|
| Intensity | Spot 25,000; Point and Area 100; Infinite, Dome, IES, Portal and Physical Sun 1 |
| Exposure | 0 |
| Spread | Area and Portal 1; Spot cone angle 40° |
| Color | White |
| Color Mode | Color |
| Temp (K) | 6500 |
| Shadow | On |
| On | On — Ctrl+click the On cell to switch a light back on |
| Other columns | The Redshift light’s neutral value — contributions 1, Samples 16, Vol Smp 8, and so on |
Checkboxes and dropdowns
Section titled “Checkboxes and dropdowns”Click a checkbox to switch it, or a dropdown to choose a value. They follow the same rules as sliders: one undo step, and they apply to every selected light.
Editing several lights at once
Section titled “Editing several lights at once”- Select the lights — click their names (Shift or Ctrl+click to add more), tick their select boxes, or click Select All. Selecting them in the Object Manager works too.
- Change a value on any of the selected rows.
The same change is made on every selected light. Changing a value on a row that is not selected changes only that light.
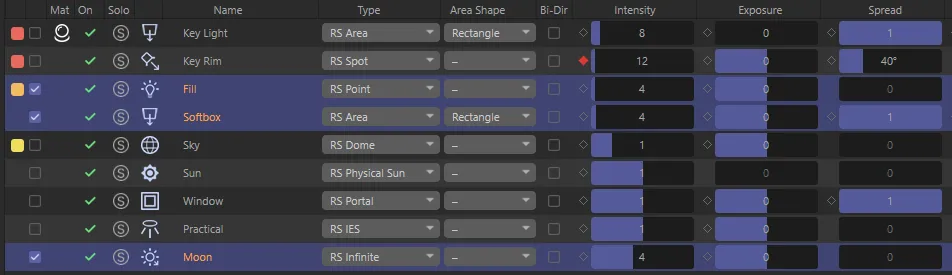
Things to know:
- Only rows you can see are edited. A selected light hidden by the search is left alone.
- Settings a light doesn’t have are skipped. Switching Shadow on across a mixed selection leaves the Physical Sun as it is.
- Intensity across different types is kept inside each light’s own slider range, so dragging a Spot to 50,000 doesn’t send a selected Dome light to 50,000.
- Spread means different things on a Spot (cone angle) and on an Area or Portal light (0–1). Edit it with one of those kinds selected at a time.
- Name — renaming a selected row gives every selected light that name.
- Type — changing the type on a selected row changes every selected light, and renames them to match.
Lights with an RS Light Material
Section titled “Lights with an RS Light Material”When an RS Light Material drives a light, Intensity, Exposure, Color, Color Mode, Temp (K), Shadow and Opacity are written to the material’s graph instead of the light. You edit them exactly as usual. See Light material graphs.
If the material is shared by several lights, the panel asks first:
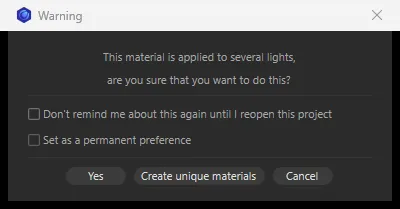
| Choice | Result |
|---|---|
| Yes | Edit the shared material — every light that uses it changes |
| Create unique materials | Give each affected light its own copy of the material, then make the edit |
| Cancel | Change nothing |
Tick Don’t remind me about this again until I reopen this project to skip the question for now, or Set as a permanent preference to stop it for good. You can turn the question back on in Preferences.